



How to Install CPVC Sprinkler Fittings Safely
A sprinkler line can look correct at rough-in and still fail inspection or testing because of one preventable issue: the wrong cement, a poorly prepared pipe end, or a fitting joined before the installer confirms compatibility. To install CPVC sprinkler fittings correctly, treat the pipe, fittings, cement, sprinklers, hangers, and transition components as one listed system - not as interchangeable plastic parts.
CPVC is widely used in light-hazard sprinkler applications because it is corrosion-resistant, lightweight, and efficient to assemble. Those advantages depend on following the specific pipe manufacturer’s installation instructions, the sprinkler listing, NFPA requirements, and the authority having jurisdiction. A fast installation is only valuable when the system is ready for inspection, hydrostatic testing, and long-term service.
Before You Install CPVC Sprinkler Fittings
Start by verifying that the materials belong together. Confirm the pipe schedule and diameter, fitting manufacturer, solvent cement, sprinkler type, adapter configuration, and system application. A CPVC fitting may look compatible with another manufacturer’s pipe, but appearance and nominal size are not proof of a listed assembly.
Review the applicable manufacturer data before opening the cement can. Product instructions can differ by pipe size, ambient temperature, humidity, storage conditions, and whether the work involves a repair, a new branch line, or a transition to steel. The installation must also match the approved sprinkler plans and the project’s adopted NFPA 13 requirements.
Verify the Environment and Material Condition
Keep CPVC pipe and fittings protected from impact, excessive heat, direct jobsite abuse, and chemical exposure. Certain lubricants, paints, sealants, cutting oils, insulation adhesives, and firestop materials can be incompatible with CPVC. Do not assume that a product labeled for plumbing use is acceptable near a sprinkler installation.
Cold conditions deserve extra attention. Lower temperatures can affect handling and solvent cement cure time, while hot, dry conditions can reduce the available assembly time after cement is applied. Store and condition materials as directed by the manufacturer, and do not install pipe that is cracked, gouged, badly scratched, or distorted.
Use Only the Specified Joining Materials
Solvent cement is part of the system, not a general-purpose adhesive. Use the cement specified for the pipe and fitting system, within its shelf life, and apply it with the recommended applicator. Do not substitute a plumbing cement, mix products, thin cement, or use a primer unless the manufacturer’s instructions specifically call for it.
The same discipline applies to threaded transitions. Use listed CPVC-to-metal adapters where required, follow the approved thread sealant guidance, and avoid over-tightening. Threaded plastic adapters can crack under excessive torque, especially when installers try to correct alignment after the joint is tightened.
How to Install CPVC Sprinkler Fittings
Begin with a clean, square cut. Use a cutting tool approved for CPVC or a fine-tooth saw that will not crush or crack the pipe. Remove burrs from the inside and outside of the cut end. Internal burrs can restrict water flow or interfere with proper seating, while external burrs can scrape cement from the fitting socket during assembly.
Dry-fit the pipe and fitting only as allowed by the product instructions. Mark the pipe at the fitting socket depth so the installer can confirm full insertion during assembly. This simple mark is useful quality control on every joint, particularly when working overhead or in congested ceiling spaces.
Apply solvent cement using the manufacturer’s prescribed method. Coverage, application sequence, and assembly time matter. The goal is a continuous, properly wetted joint without dry spots, heavy puddling, or cement pushed into the waterway. Immediately insert the pipe fully into the fitting, using the required turning motion if specified, and hold the joint briefly so it does not back out.
A visible bead of cement around the fitting hub can help indicate that the joint was assembled with adequate material, but it is not the only acceptance check. Confirm that the depth mark is at the fitting entrance and that the pipe is fully seated. Wipe excess cement from the exterior only when doing so will not disturb the connection.
Do not attempt to reposition a cemented fitting after the assembly window has passed. Cutting out and replacing a misaligned section is the safer option. Twisting a partially cured joint or forcing a line into alignment can introduce stress that may not be visible at inspection.
Respect Cure Time Before Testing
Cure time is one of the most commonly underestimated parts of CPVC installation. The required interval before pressure testing depends on pipe size, temperature, humidity, and the specific cement system. A joint that feels firm is not necessarily ready for hydrostatic pressure.
Use the manufacturer’s cure schedule and the project testing requirements. Document the installation time when conditions make cure time a concern, especially on large repairs, overnight work, or cold-weather projects. Pressurizing too early can compromise joints and turn a routine test into a costly rework event.
Support, Spacing, and Sprinkler Connection Details
CPVC sprinkler pipe must be supported according to the applicable listing, manufacturer requirements, and approved system design. Hanger spacing, restraint, branch-line routing, and clearances are not field preferences. They affect deflection, thermal movement, sprinkler position, and the long-term load placed on fittings.
Avoid using CPVC pipe as a support for other trades. Keep it clear of sharp edges, unprotected penetrations, and locations where it can be struck by equipment or stored materials. Where the system passes through building elements or transitions to metal pipe, use the protection and support details specified for that assembly.
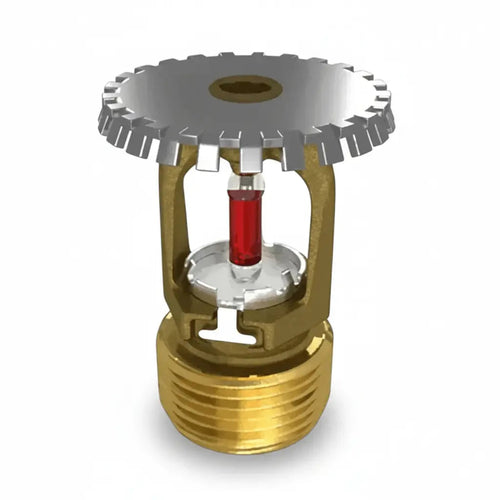
Sprinkler drops and arms deserve particular care. Use the correct listed fittings and adapters for the sprinkler arrangement, maintain the required sprinkler orientation and deflector location, and avoid applying wrench force through CPVC components. If the sprinkler manufacturer specifies a particular drop configuration or wrenching method, that instruction controls.
Common Installation Errors That Create Rework
Most CPVC problems trace back to a small group of preventable shortcuts. The first is mixing components because they are readily available on site. The second is using the wrong solvent cement or an expired container. The third is cutting pipe unevenly and skipping burr removal. The fourth is testing before the joints have cured.
Other issues are less obvious. Over-tightening threaded adapters, exposing pipe to incompatible chemicals, allowing unsupported pipe to sag, and using unapproved hanger arrangements can all create problems after the ceiling is closed. A contractor may not see the consequence until pressure testing, inspection, or a future service call.
For retrofit work, confirm what is already installed before ordering replacement parts. Identify the existing pipe manufacturer, fitting style, nominal size, sprinkler system type, and any transition components. If the existing material cannot be verified or appears damaged, consult the system manufacturer and the AHJ rather than relying on a visual match.
Build the Job Around Compatible, Code-Conscious Components
Fire sprinkler work leaves little room for low-cost substitutions. Source CPVC pipe, fittings, cement, adapters, and associated sprinkler components from recognized manufacturers, and keep product documentation available for the installer, inspector, and project file. For specialized replacements or larger material packages, Fire Protection Parts can help contractors source dependable, code-conscious components without piecing an assembly together from questionable substitutes.
The best time to solve a compatibility question is before a fitting is cemented into an overhead line. Confirm the listed system, protect the materials, follow the cure schedule, and let the manufacturer instructions guide the work. That approach protects the installation schedule while keeping the focus where it belongs: a sprinkler system that performs when it is needed.

